SvgCuts

Thursday, December 16, 2010

Gift bag


Here is my entry for Polka Doodles week 49 challenge - Project to hold a gift.

I took a small brown paper bag and covered it on both sides with paper from the DCWV Stack 6. I cut a topper for my bag using Penny Duncan's 4 point 6 scallop nesting mat. I stamped my nephew's name with some hero arts letter stamps in white ink and colored it in with some prismacolor pencils.

I put the gift inside (not telling what it is, just in case my nephew looks at my blog!). I folded the topper in half and put it on the top of the bag and punched two holes through the topper and the bag. I attached some silver eyelets in the front and the back of the topper. I then threaded some ribbon and tied it all shut with a bow :)

Here is the link to the challenge:
Polka Doodles

Saturday, October 30, 2010

Fall Cards


These were my entry's for the September Hero Arts contest.

If you have any questions, leave a comment with a way for me to get back to you.

Friday, October 29, 2010

Hero Arts Large Flower Stamp CG 134


I just got this new stamp and had to try it out!

Supplies:

*Copic marker
*Gelly Roll clear star pen
*Prismacolor pencils
*Embossing Powder- white and clear
*Ink - Versamark, Memories Dye Inkpad (white)
*Stamps - HA Large Flower (CG134), HA Cling Dots (CG 139)

If you have any questions, leave me a comment with a way for me to get back to you :)

Thursday, October 28, 2010

Happy Birthday Card


I saw the 'bandanna' technique over on the blog called "Fabulously Artsy". I tried it out on this Hero Arts flower stamp.

Supplies:

Distress Ink - Broken China
Prismacolor Pencils
Computer generated sentiment

Any questions? Leave a comment with a way for me to email you back :)

Wednesday, October 27, 2010

Birthday Card


Here's a card for my brother-in-laws birthday. No paper doll dress up this time :)

Supplies:

Cricut-wild card (candles), Sure Cuts a lot (font on inside), Inkscape

If you have any questions, leave me a comment with a way for me to get back to you :)

Tuesday, October 26, 2010

Cupcake Birthday Card


Hello everyone! Sorry it's been so long since I last posted :(

I'm going to start doing things a little differently. Hopefully I'm not going to be quite as long winded as before.

Here is a card I made for my daughter's 13th birthday.

Supplies:
Cricut-Wild Card cartridge (cupcake)
Distress Inks-Worn Lipstick, Peeled Paint, and Broken China
Heat Gems
Stamps-Hero Arts Tiny Dot Letters, Michaels Dollar Stamps (letter 'E'), Tim Holtz Visual Artistry Stamp (text on candle, not sure which set)

If you have any questions leave me a comment with a way for me to reply back :)

Sunday, June 6, 2010

Cute Mouse with Flower Card


I made the main element on this card using a really cute mouse with flower digital stamp by Meljen Designs. I colored it with markers and colored pencils. I used some fruit punch stickles on the cheeks and some glossy accents on the flower and stem. I dry embossed the layer under the mouse with my fiskars scrapboss using elements from the rectangle/wave and rectangle/classic shape boss stencils. I added the two layers to some DCWV paper as the card base. I added three pearls to the upper right side of the card.

I'm entering this into the challenges at:

-Caardvarks June card challenge
-Meljen Designs DT Blog Challenge #10 Dry Embossing
-Stampin' Sisters in Christ Challenge #42

Saturday, June 5, 2010

Fancy Hello Kitty


Here is a card I made using the Hello Kitty and Paper Doll Dress-Up cartridges. I did alot of altering to this one. I cut the hair, flower decoration in the hair and the dress from the paper doll dress-up cartridge. I used cricut design studio to size everything on hello kitty. I colored the dress and flower decoration(which I had cut in white) with spiced marmalade distress ink. I used a fine tip black pen and a white gel pen to add detail to the dress and the hair decoration. I also used a orange pen with a fine tip on the dress too. I added pearls to the hair decoration and one on the dress. I used some liquid pearls on the dress too.

I made the backround paper myself. I used a white base and inked with broken china and tumbled glass distress inks. I stamped over the top with two different flower stamps, also using the same colored distress inks. Then I ran it through my sizzix texture boutique and embossed using the swirls cuttlebug folder.

I'm entering this into the challenges on the following blogs:

Caardvarks June challenge
My Creative Time 1rst Throwback Thursday Challenge

Wednesday, May 19, 2010

Aloha card


Here is a card I made using an image that I found on the BBTB2 blog for the contest they have going on right now. It's an image from Peggy Loves Vintage. I printed out the little hula girl and cut it to the size I wanted. I attached it to my card and added some glossy accents to her lei, the flowers by her ears and the flowers on her ankles. I also added some gold stickles to her skirt. I cut the colored flower chain (spiced marmalade distress ink)out twice using my cricut design studio and my cricut (the flower chain can be found on the Paper Doll Dress-up cartridge). I adhered them to the card and then added some yellow puff paint to the flower centers. I designed the 'ALOHA' word in SCAL and cut it out with my cricut using black cardstock and adhered it to the card.

You can find the contest at:

Bitten by the Bug 2

Birthday Card for my Sister-in-Law


I cut some white cardstock for the top layer of my card. I added some peeled paint, tumbled glass and broken china distress inks. I dry embossed it with a sizzix embossing folder (can NOT remember the name, sorry). I cut the orange decorative band out of white paper(using SCAL and my cricut)and colored it with spiced marmalade distress ink. I sprayed it with some perfect pearls and water. I then adhered it to my top layer. I typed the sentiment out on my computer and printed it out on vellum. I adhered it to a piece of black cardstock and adhered it to the orange decorative band with some scotch foam tape. I stamped a butterfly using the antique engravings Hero Arts stampset. I colored it with a crayola marker and two different metallic gelly roll pens. I cut it out, cutting off the antennae. I used some beading wire to make some antennae and attached it to the back with some glossy accents. Then I attached the butterfly to the decorative band with some scotch foam tape.

Wednesday, May 12, 2010

Cute Owl Birthday Card


Here is a card I made using as the main element a SVG that I made using a coloring book page I found. I made the SVG in Inkscape and cut through SCAL on my cricut. I cut the beak, feet, branch and leaves out from white paper and colored with my markers. I used a polka dot patterned DCWV paper for the body of the owl. I used a blue patterned DCWV paper from the same stack as the polka dot paper (The Stack 6). I adhered the owl to the card front with scotch foam tape. I attached some bronze colored buttons with my crop-a-dile. The sentiment is a piece of ribbon that I bought from Michael's.

I'm entering this into the challenge over at:

Penny's Paper-Crafty Challenge blog

The challenge is to use 1 ribbon, 2 pattern papers and 3 embellishments. It's challenge #29

Butterfly and buttons card


Here is a card I made using some patterned paper from DCWV for the topper of the card. I used a strip of white card stock for the rectangular piece and the circles. I colored the rectangular strip with tumbled glass and broken china distress inks. Then I sprayed it with the perfect pearls/water mixture using a mini mister. I adhered three heart buttons with embroidery floss tied on to the rectangular strip. Then I cut two circles with my cricut using the plantin schoolbook cartridge. I cut one circle 2 1/2" and one circle 2 1/4". I colored the 2 1/2 circle with broken china distress ink and I colored the 2 1/4" circle with tumbled glass distress ink. I adhered the two circles together and adhered to the rectangle with some scotch foam tape. I stamped a flower from the Color Me Flowers Hero Art set and also a butterfly from the Hero Arts antique engravings set. I colored them both and put some white gel pen highlights on both. I cut them out and adhered them to the circles. I had to draw the antennas for the butterfly with a fine tip black pen.

I am entering this card in the challenges at:

Posh Designs Scrapbook Store - I used their card sketch #14 for challenge #14
Cupcake Craft Challenge #90 using Buttons

I WON!


I entered a Mother's Day photo contest over at 300 d.p.i. and I won! I was so surprised! Here is what they wrote over on their blog:

And the Mother's Day Photo Contest Winner is...Janet Brandon

Thanks to all of our Mothers Day Photo submissions as it was really fun to see all the sweet memories that remind us of our Mothers, Grandmothers and our Children. The photos we take now we will have forever and the manipulation that we can do with them later is amazing. Years ago the word “Scrapbooking” seemed to be daunting to most as they say…I don’t have time for that. In today’s busy life, we can sit for a few minutes between the laundry and getting the kids to a game and have a little fun!

Janet Brandon used a beautiful photo with mirrored effects and complimented the photo by using a vignette around the photo. Nice work Janet! We will be contacting you with your FREE gift from 300dpi.com.

Yay! :)

A Mother's Day card for a friend


Here is a card that I made the main part of it with a cool stamp that I picked up at Craft Warehouse. The stamps if by Northwoods Rubber Stamps, Inc., stamp #P7280. It pretty much makes the whole card front, and all I needed to do was color it :) I added some patina stickles on the leaves and some diamond stickles to make little raised spots on the flowers. I made some lines with a ruler and two sizes of fine black markers around the image. I adhered it to a black card and my card was complete :)

Friday, May 7, 2010

Birthday card for my Mom


Here's the card I made for my Mom. Though it's not really a card because it doesn't open up. The birthday wishes are on the other side. You just flip it over. So, I don't know, is it a tag?

Anyway...I cut some patterned paper into a 5" square (approximately). I cut a 4" circle out of some paper that I made in adobe photoshop(just a gradient fill with a yellow and a orange). I embossed the circle with a sizzix 'dot' folder (not sure of the exact name). I adhered the circle to the square, and cut off the excess. I stitched around the perimeter of the square (only up to the circle) with some yellow thread on my sewing machine. I adhered the card top to some white cardstock (okay...I'll be truthful, it started out as a card, but the first try I had a hard time getting it on straight; the second time I creased the card a little too well; the third time I cut the card base too small after I had adhered the card front to it...need I go on?). lol! I can laugh about it now :)

I designed the flower chain in cricut design studio using the plantin schoolbook cartridge. I cut it out on my cricut. I adhered some clear jewels in the centers of the flowers. Then I used some scotch foam tape to adhere it around the curve of the circle. I used my sakura micron pen to add some dots on the flower chain. I stamped a butterfly from the Hero Arts antique engravings stampset onto some paper colored with spiced marmalade distress ink using staz on black ink. I trimmed around it and then added some white gel ink, some diamond stickles and my Sakura clear star gelly roll pen. I attached it to the front of my card with more foam tape. Then I stamped 'Mom' with some black staz on ink.

I'm entering this into the challenges over at:
Stampin' Sisters in Christ blog (#2)
C.R.A.F.T. Challenge #49 blog

Tuesday, May 4, 2010

Quick card for my daughter


Here is a card I made for my daughter. She had been having a rough time at school and I thought she might really like this card. My husband and I found this stampset at Michael's in the dollar bin. I thought it was perfect.

I cut a standard size card (5 1/2" x 4 1/4") in half. I used broken china distress ink to color the card base. I then stamped the pattern at the top and the bottom with weathered wood distress ink using another stamp we found in the dollar bin at Michael's. I colored some white cardstock with spiced marmalade distress ink and then I stamped the ticket stamp with black staz-on ink on that. I cut the ticket out and attached it to my card with some scotch foam tape. On the inside of the card I stamped the sentiment on with black staz-on ink using the second stamp that came with the stampset. I punched out some flowers with a paper punch using the leftover cardstock that I had colored with the spiced marmalade distress ink. I adhered those inside the card and did some inking around the petals with a black fine point pigma micron pen and a white gel pen.

Card for my mother-in-law


When my husband saw the card that I made for my mom for mother's day, he insisted that he wanted something like it for his mom. So I went ahead and made one using cats instead of dogs. I used the recollection 'meow meow' stampset. I stamped three cats on some white cardstock using my stamp positioner (let me tell you, I don't know how I lasted so long without purchasing one of these!). I colored all the cats making sure to make the middle one stand out by coloring it orange. I stamped the kitty image onto another piece of cardstock and I colored it the same color of orange and used my Sakura quickie glue pen to put glue on the kitty's stripes and then I put some red glitter on them. Using the second stamped kitty, I cut out the main part of the kitty (this is the layer that I added the glitter to) and adhered it to the main kitty with some scotch foam tape. I applied some fruit punch stickles on his ears (on the main layer) and his nose (on the top layer). I printed out my sentiment from my computer onto some cardstock. I adhered my patterned paper onto my card base after I stitched the kitty section and the sentiment section on and added some ribbon. I rounded all my corners. I stamped a ball of yarn and adhered it next to the sentiment.

I'm entering this into the current challenge over at the Stampin' Sisters in Christ blog.

Oval card for my sister


Here is a card that I made for my sister for Mother's Day. I used a flower stencil I had and stenciled (sp?) on a piece of white cardstock. I used scattered straw, worn lipstick and peeled paint distress inks. I used some fine tip pens and outlined all the parts of the flower. I then cut out all the parts and adhered them to another piece of cardstock cut in an oval shape that I had colored with broken china distress ink. I popped up a few of the flower petals and I added some inking on the flower to add some dimension. I added my sentiment at the bottom. I adhered the flower layer to some white cardstock and then adhered those to my card base. My card base started out square, but I used the upper layer to cut it to the oval shape.

I'm entering this into the current challenges over at:
lily-boo challenge blog
c.r.a.f.t. challenge
meljen's designs DT blog
Penny's Paper-Crafty Challenge Blog

Saturday, May 1, 2010

Mother's Day Card


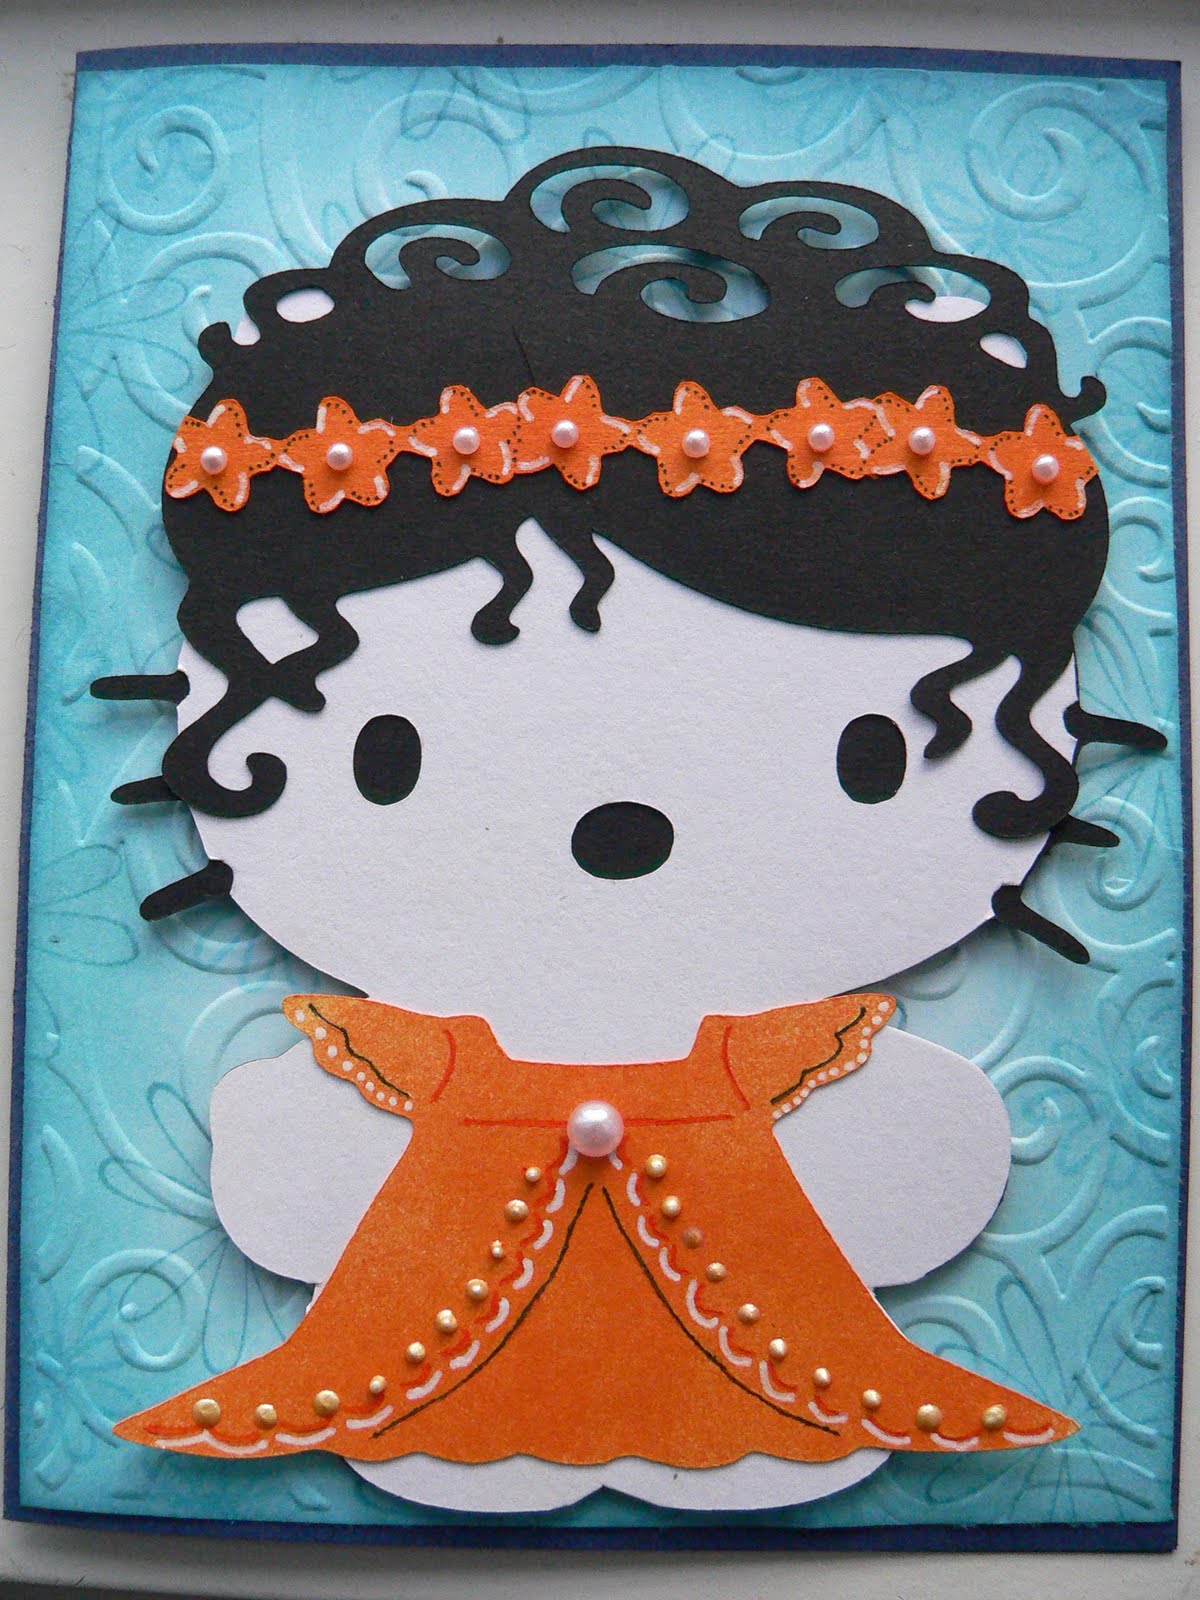
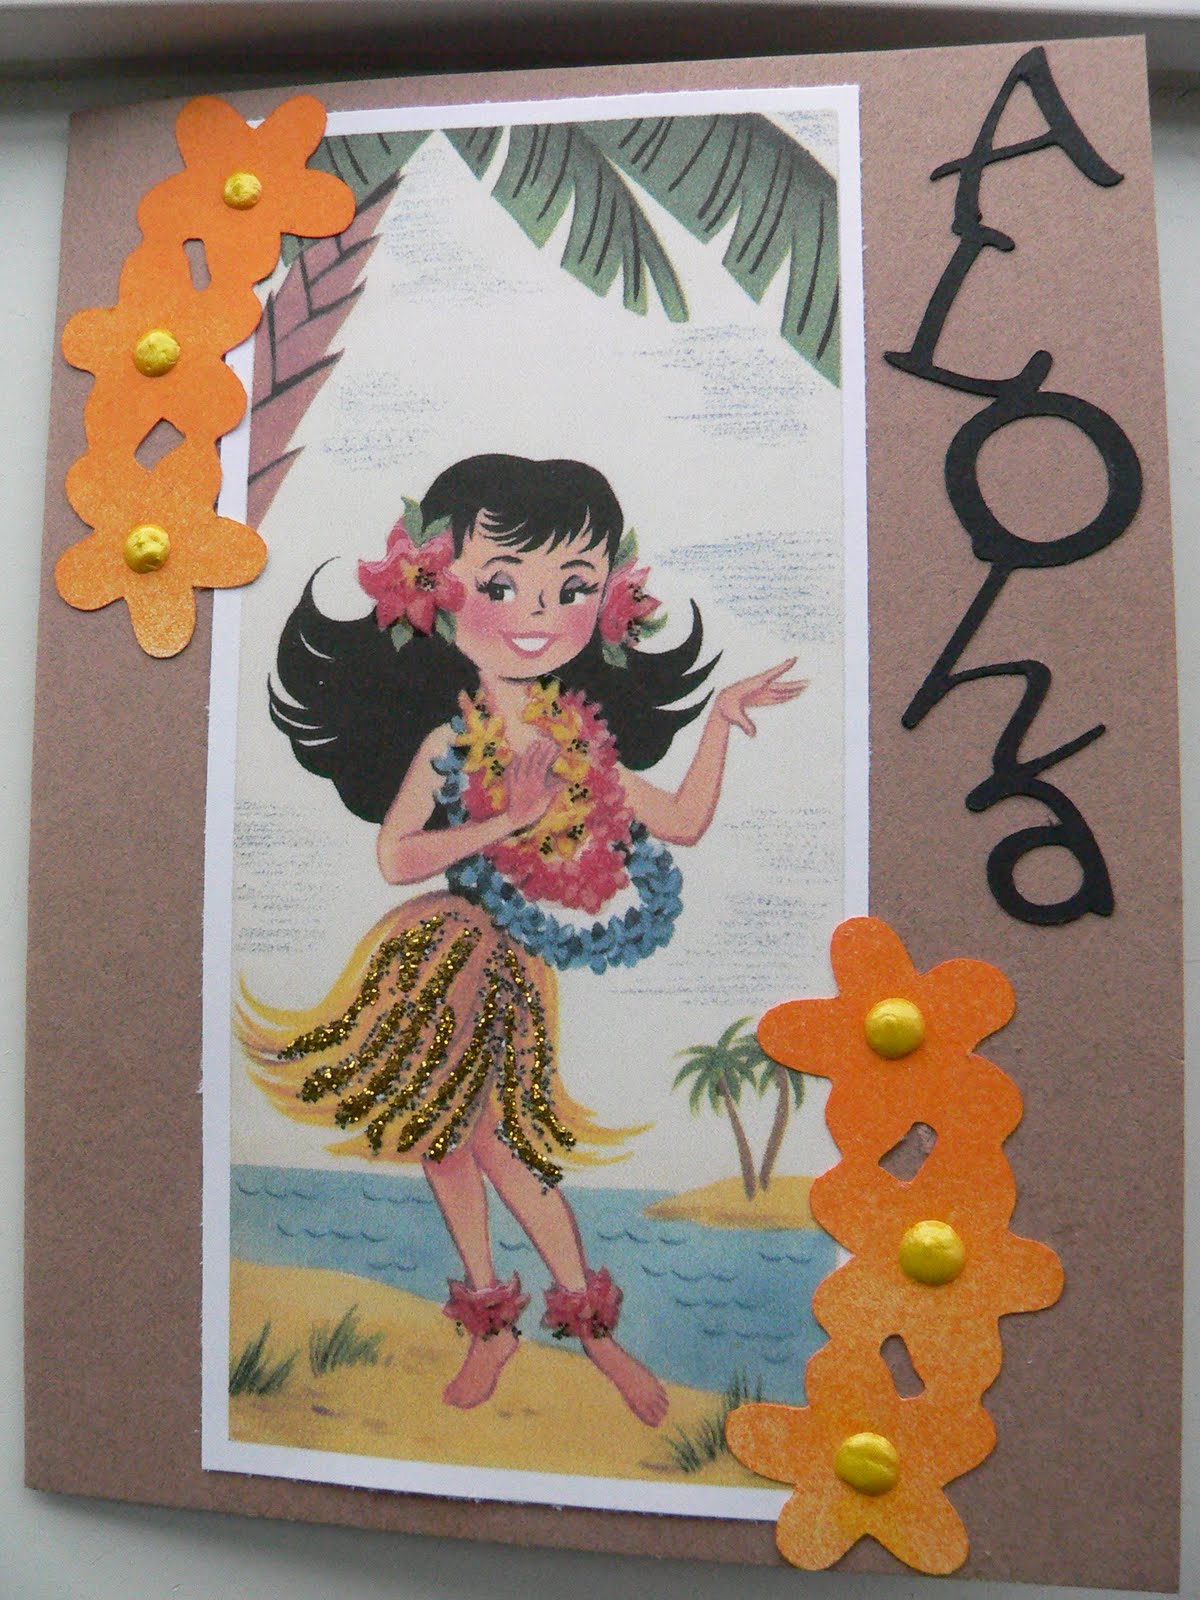
Here is the card I made for my Mom. I used a stamp from the 'Woof Woof' recollections set (#1305). I stamped it onto some paper that I had stamped with a Michael's $1 stamp. I cut out the fluffy parts of the dog and adhered them onto another duplicate stamped image (does that sound as violent to you as it does to me? lol!). I popped up some of the fluffy patterned pieces with scotch foam tape and glued some straight onto the bottom image. In case you didn't notice, I had to cut out the bottom image, and boy, was that labor intensive! I had to cut out some internal sections with an x-acto (sp?) knife. I used a stamp positioner to stamp the other two dogs on the card front. I colored them with some colors that I thought would make them not stand out too much. Then I colored the rest of the middle one with a color that would stand out. I typed the sentiment out on my computer and printed it out on the card front. I adhered some 'pocket full of posies' DCWV paper under my front layer and then adhered all of those to my card base.

Maybe I should mention that I designed the card front in cricut design studio using the plantin schoolbook cartridge and cut it out on my cricut.

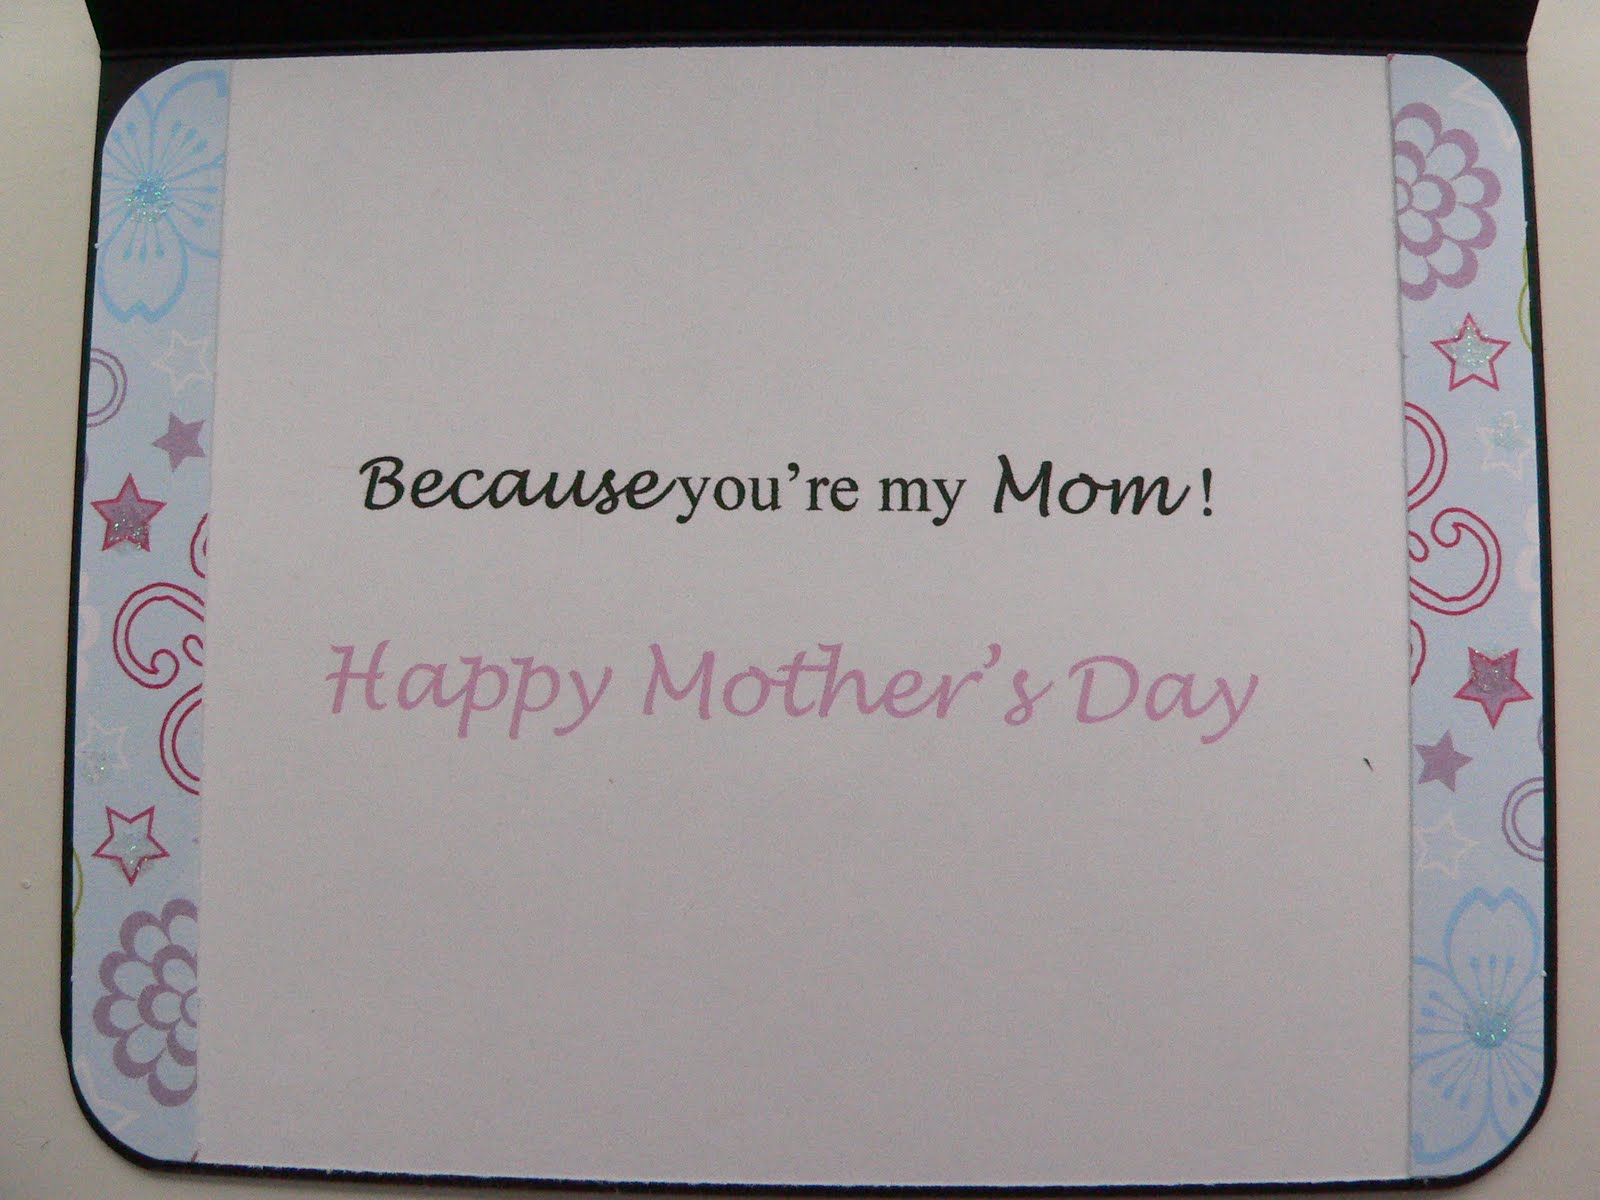
The sentiment on the inside of the card was also printed out off my computer onto some white cardstock. I rounded those corners and adhered onto the inside of my card. I cut 1/2" strips of the same DCWV paper I used on the front and rounded those corners too and adhered it onto the white cardstock inside the card.

I'm going to enter this into The Pink Stamper's national scrapbook day challenge over at her blog.

And while I'm at it, I'm going to enter this in over on the Stampin' Sisters in Christ Challenge blog.

Friday, April 30, 2010

Mask made with wild card and cricut

Here is a video that I made for youtube. I made a mask or stencil (not sure which it is, or is it both?) using grafix clear craft plastic. I had to cut this approximately three times on my cricut. It really dulled out my blade, but I am pleased with what I ended up with. I think this can be used alot on my cards. You can use it over and over with different colors of inks. It can be used as the main card front or as a backround...in other words, I think I'm trying to say that it is very versatile :) I set this up to cut using my cricut design studio. I wanted to be able to utilize as much of the 8 1/2 x 11 sheet of the craft plastic as I could.

Word of warning: I pretty much was bent over my cricut the whole time that it was cutting. Towards the end of cutting I had to make sure and remove any little pieces of plastic that had popped out of the cut. If you don't watch it, these little pieces can get caught up in your blade, and then it's pretty much not cutting anymore :(

Tin foil embossing video/Pagoda card


Here is my you tube video showing how I emboss Reynolds Heavy Duty Wrap. Also, I have included a picture of a card where I used this technique to make the backround layer. I also used a cut from the Pagoda cricut cartridge. I cut the dragonfly out twice, once in cardstock and once from recycled cardboard (from food packaging). I adhered the two cut out dragonflies and stamped a layer of versamark over the top. I then used gold embossing powder and heat embossed it. I cut the wing layer out of some floral chiyogami paper. I designed the cut for the location of the sentiment in inkscape and cut in SCAL. I printed the sentiment off of my computer. Then I adhered the two layers of the sentiment square (is there some less awkward way to say this?) together and taped some gold thread around the shape. I attached the dragonfly and the sentiment square down with scotch foam adhesive.

I'm also including a picture of another card I made with embossed reynolds wrap. It's a mosaic card and I mention it in my video :)

Just a little side note: You can find this card on the My Pink Stampers blog in her gallery section under 'Pagoda'. I had entered this into her Design Team search. I wasn't picked but received an email asking if I would like to submit this for her first gallery. WooHoo! :) lol

Tuesday, April 20, 2010

You & Me card


Here is a card that I made to enter into the challenge over on the KWernerDesign Blog. Her challenge was to create a one-layer card. I made a rectangular mask by tearing a rectangle out of white cardstock. I temporarily adhered it to my card base and inked all over the card front with broken china distress ink. Then I stamped over the top of it with the Hero Arts swirls backround stamp in peeled paint distress ink. I removed the mask and then stamped my frog stamp in black staz on ( I don't know who made this stamp as it was in a box set from Costco). I colored in the frog stamp with colored pencils. I then stamped the sentiment 'you & me' in black staz on. To finish the card off, I paper pierced around the swirls on the backround stamp.

Saturday, April 10, 2010

Pink, Green & Black Card


Here is a card I made for the Pink Stamper's challenge. I used papers that I bought from the 300 DPI (DCWV) website. It's the Mariposa 2 pack. I used three different papers on my card. I cut 1" circles out using the Plantin Schoolbook cartridge on my cricut. I adhered my pink paper and my green paper, and then adhered the circles across the seam. I then stitched it down with my sewing machine. I used the a butterfly element from the paper pack too. I pop dotted that on. I then stamped the sentiment 'Happy Mother's Day' from a inkadinkadoo set.

Sunday, March 28, 2010

Another Layered Flower Card


Here is another card I made using a coloring book image found on the web. This one is a bit more subtle then the last one, because I used papers that were more similar in color. I used three different papers from two different digital paper kits that I got for free off the internet. I used the same paper for the flower petals as I did for the backround paper. I used a cream colored paper for the flower face and the pot. I then used a green paper for the stem and leaves. I used foam tape to attach my flower to the matting (made with a piece of black paper and a piece of white paper I put through my sizzix embossing machine with the mosaic cuttlebug folder). I stamped the sentiment with a $1 stamp I got from Joanne's using staz on ink.

I'm entering this card into the Moxie Fab World challenge and over on the Paper, Scissors and Superheroes blog.