SvgCuts

Friday, May 7, 2010

Birthday card for my Mom


Here's the card I made for my Mom. Though it's not really a card because it doesn't open up. The birthday wishes are on the other side. You just flip it over. So, I don't know, is it a tag?

Anyway...I cut some patterned paper into a 5" square (approximately). I cut a 4" circle out of some paper that I made in adobe photoshop(just a gradient fill with a yellow and a orange). I embossed the circle with a sizzix 'dot' folder (not sure of the exact name). I adhered the circle to the square, and cut off the excess. I stitched around the perimeter of the square (only up to the circle) with some yellow thread on my sewing machine. I adhered the card top to some white cardstock (okay...I'll be truthful, it started out as a card, but the first try I had a hard time getting it on straight; the second time I creased the card a little too well; the third time I cut the card base too small after I had adhered the card front to it...need I go on?). lol! I can laugh about it now :)

I designed the flower chain in cricut design studio using the plantin schoolbook cartridge. I cut it out on my cricut. I adhered some clear jewels in the centers of the flowers. Then I used some scotch foam tape to adhere it around the curve of the circle. I used my sakura micron pen to add some dots on the flower chain. I stamped a butterfly from the Hero Arts antique engravings stampset onto some paper colored with spiced marmalade distress ink using staz on black ink. I trimmed around it and then added some white gel ink, some diamond stickles and my Sakura clear star gelly roll pen. I attached it to the front of my card with more foam tape. Then I stamped 'Mom' with some black staz on ink.

I'm entering this into the challenges over at:
Stampin' Sisters in Christ blog (#2)
C.R.A.F.T. Challenge #49 blog

Tuesday, May 4, 2010

Quick card for my daughter


Here is a card I made for my daughter. She had been having a rough time at school and I thought she might really like this card. My husband and I found this stampset at Michael's in the dollar bin. I thought it was perfect.

I cut a standard size card (5 1/2" x 4 1/4") in half. I used broken china distress ink to color the card base. I then stamped the pattern at the top and the bottom with weathered wood distress ink using another stamp we found in the dollar bin at Michael's. I colored some white cardstock with spiced marmalade distress ink and then I stamped the ticket stamp with black staz-on ink on that. I cut the ticket out and attached it to my card with some scotch foam tape. On the inside of the card I stamped the sentiment on with black staz-on ink using the second stamp that came with the stampset. I punched out some flowers with a paper punch using the leftover cardstock that I had colored with the spiced marmalade distress ink. I adhered those inside the card and did some inking around the petals with a black fine point pigma micron pen and a white gel pen.

Card for my mother-in-law


When my husband saw the card that I made for my mom for mother's day, he insisted that he wanted something like it for his mom. So I went ahead and made one using cats instead of dogs. I used the recollection 'meow meow' stampset. I stamped three cats on some white cardstock using my stamp positioner (let me tell you, I don't know how I lasted so long without purchasing one of these!). I colored all the cats making sure to make the middle one stand out by coloring it orange. I stamped the kitty image onto another piece of cardstock and I colored it the same color of orange and used my Sakura quickie glue pen to put glue on the kitty's stripes and then I put some red glitter on them. Using the second stamped kitty, I cut out the main part of the kitty (this is the layer that I added the glitter to) and adhered it to the main kitty with some scotch foam tape. I applied some fruit punch stickles on his ears (on the main layer) and his nose (on the top layer). I printed out my sentiment from my computer onto some cardstock. I adhered my patterned paper onto my card base after I stitched the kitty section and the sentiment section on and added some ribbon. I rounded all my corners. I stamped a ball of yarn and adhered it next to the sentiment.

I'm entering this into the current challenge over at the Stampin' Sisters in Christ blog.

Oval card for my sister


Here is a card that I made for my sister for Mother's Day. I used a flower stencil I had and stenciled (sp?) on a piece of white cardstock. I used scattered straw, worn lipstick and peeled paint distress inks. I used some fine tip pens and outlined all the parts of the flower. I then cut out all the parts and adhered them to another piece of cardstock cut in an oval shape that I had colored with broken china distress ink. I popped up a few of the flower petals and I added some inking on the flower to add some dimension. I added my sentiment at the bottom. I adhered the flower layer to some white cardstock and then adhered those to my card base. My card base started out square, but I used the upper layer to cut it to the oval shape.

I'm entering this into the current challenges over at:
lily-boo challenge blog
c.r.a.f.t. challenge
meljen's designs DT blog
Penny's Paper-Crafty Challenge Blog

Saturday, May 1, 2010

Mother's Day Card


Here is the card I made for my Mom. I used a stamp from the 'Woof Woof' recollections set (#1305). I stamped it onto some paper that I had stamped with a Michael's $1 stamp. I cut out the fluffy parts of the dog and adhered them onto another duplicate stamped image (does that sound as violent to you as it does to me? lol!). I popped up some of the fluffy patterned pieces with scotch foam tape and glued some straight onto the bottom image. In case you didn't notice, I had to cut out the bottom image, and boy, was that labor intensive! I had to cut out some internal sections with an x-acto (sp?) knife. I used a stamp positioner to stamp the other two dogs on the card front. I colored them with some colors that I thought would make them not stand out too much. Then I colored the rest of the middle one with a color that would stand out. I typed the sentiment out on my computer and printed it out on the card front. I adhered some 'pocket full of posies' DCWV paper under my front layer and then adhered all of those to my card base.

Maybe I should mention that I designed the card front in cricut design studio using the plantin schoolbook cartridge and cut it out on my cricut.

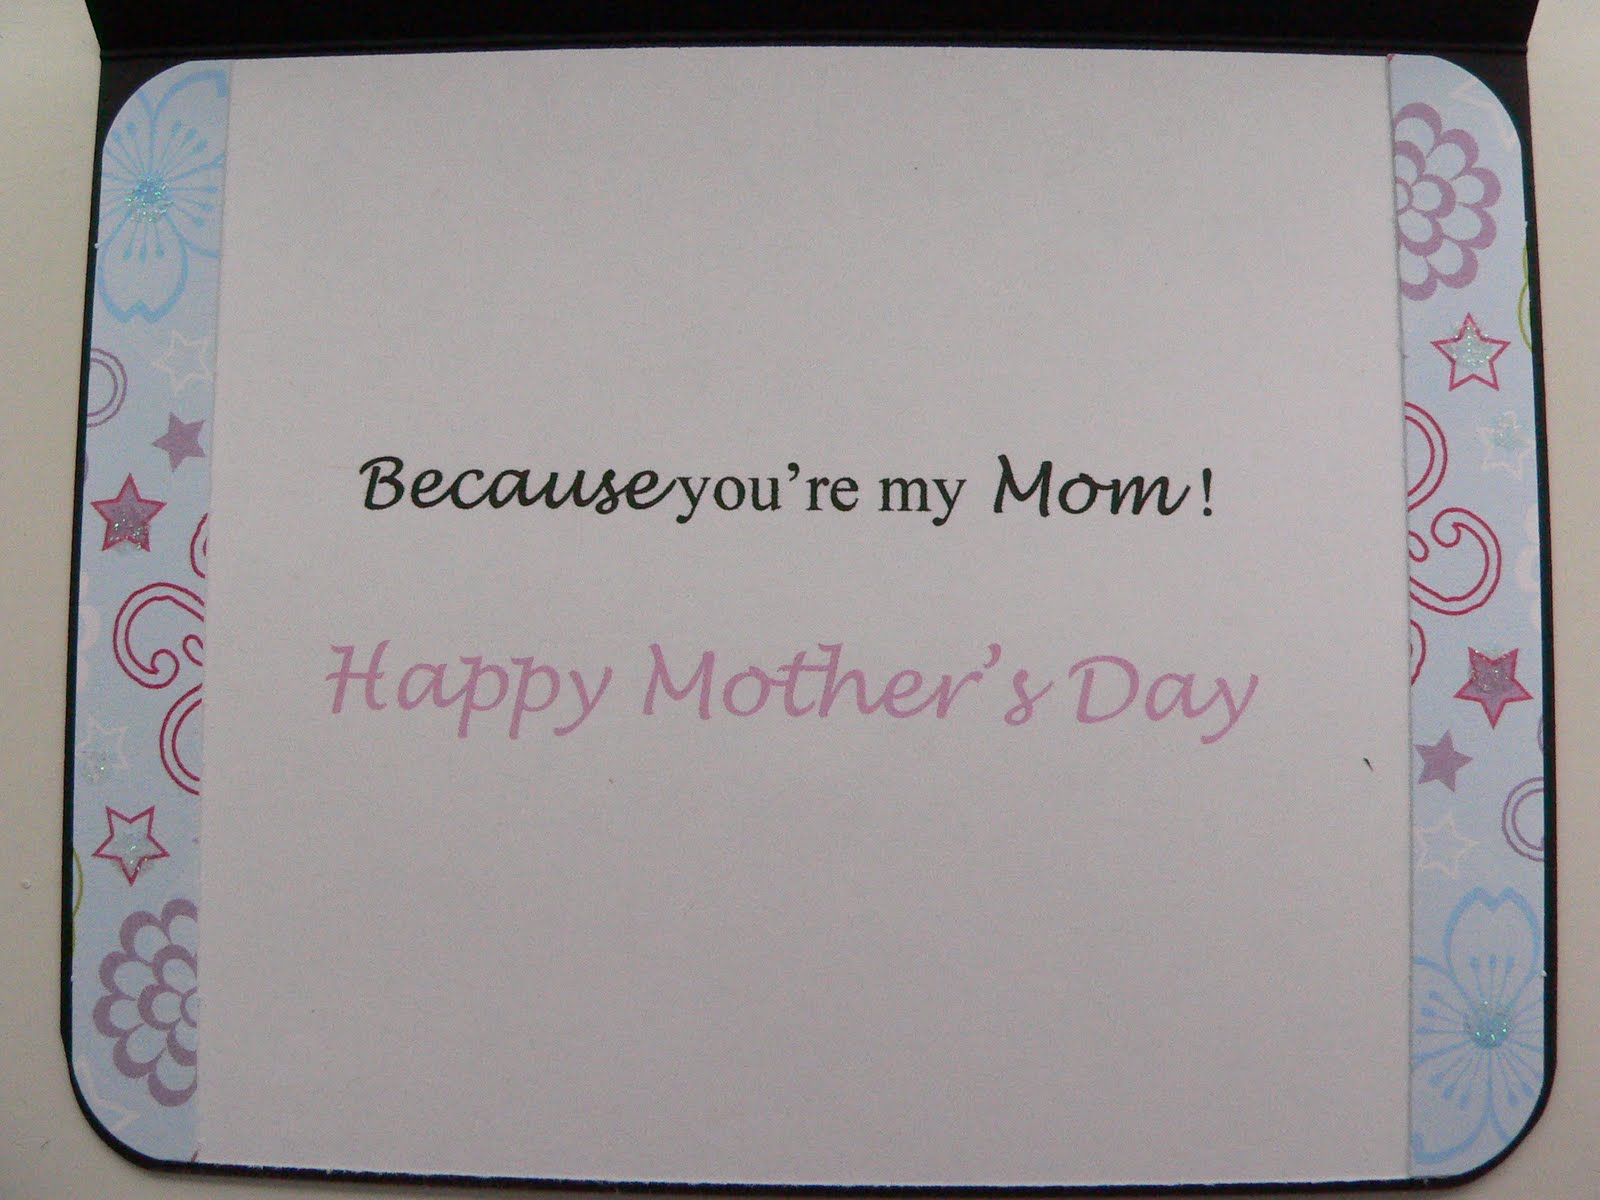
The sentiment on the inside of the card was also printed out off my computer onto some white cardstock. I rounded those corners and adhered onto the inside of my card. I cut 1/2" strips of the same DCWV paper I used on the front and rounded those corners too and adhered it onto the white cardstock inside the card.

I'm going to enter this into The Pink Stamper's national scrapbook day challenge over at her blog.

And while I'm at it, I'm going to enter this in over on the Stampin' Sisters in Christ Challenge blog.

Friday, April 30, 2010

Mask made with wild card and cricut

Here is a video that I made for youtube. I made a mask or stencil (not sure which it is, or is it both?) using grafix clear craft plastic. I had to cut this approximately three times on my cricut. It really dulled out my blade, but I am pleased with what I ended up with. I think this can be used alot on my cards. You can use it over and over with different colors of inks. It can be used as the main card front or as a backround...in other words, I think I'm trying to say that it is very versatile :) I set this up to cut using my cricut design studio. I wanted to be able to utilize as much of the 8 1/2 x 11 sheet of the craft plastic as I could.

Word of warning: I pretty much was bent over my cricut the whole time that it was cutting. Towards the end of cutting I had to make sure and remove any little pieces of plastic that had popped out of the cut. If you don't watch it, these little pieces can get caught up in your blade, and then it's pretty much not cutting anymore :(

Tin foil embossing video/Pagoda card


Here is my you tube video showing how I emboss Reynolds Heavy Duty Wrap. Also, I have included a picture of a card where I used this technique to make the backround layer. I also used a cut from the Pagoda cricut cartridge. I cut the dragonfly out twice, once in cardstock and once from recycled cardboard (from food packaging). I adhered the two cut out dragonflies and stamped a layer of versamark over the top. I then used gold embossing powder and heat embossed it. I cut the wing layer out of some floral chiyogami paper. I designed the cut for the location of the sentiment in inkscape and cut in SCAL. I printed the sentiment off of my computer. Then I adhered the two layers of the sentiment square (is there some less awkward way to say this?) together and taped some gold thread around the shape. I attached the dragonfly and the sentiment square down with scotch foam adhesive.

I'm also including a picture of another card I made with embossed reynolds wrap. It's a mosaic card and I mention it in my video :)

Just a little side note: You can find this card on the My Pink Stampers blog in her gallery section under 'Pagoda'. I had entered this into her Design Team search. I wasn't picked but received an email asking if I would like to submit this for her first gallery. WooHoo! :) lol

Tuesday, April 20, 2010

You & Me card


Here is a card that I made to enter into the challenge over on the KWernerDesign Blog. Her challenge was to create a one-layer card. I made a rectangular mask by tearing a rectangle out of white cardstock. I temporarily adhered it to my card base and inked all over the card front with broken china distress ink. Then I stamped over the top of it with the Hero Arts swirls backround stamp in peeled paint distress ink. I removed the mask and then stamped my frog stamp in black staz on ( I don't know who made this stamp as it was in a box set from Costco). I colored in the frog stamp with colored pencils. I then stamped the sentiment 'you & me' in black staz on. To finish the card off, I paper pierced around the swirls on the backround stamp.

Saturday, April 10, 2010

Pink, Green & Black Card


Here is a card I made for the Pink Stamper's challenge. I used papers that I bought from the 300 DPI (DCWV) website. It's the Mariposa 2 pack. I used three different papers on my card. I cut 1" circles out using the Plantin Schoolbook cartridge on my cricut. I adhered my pink paper and my green paper, and then adhered the circles across the seam. I then stitched it down with my sewing machine. I used the a butterfly element from the paper pack too. I pop dotted that on. I then stamped the sentiment 'Happy Mother's Day' from a inkadinkadoo set.

Sunday, March 28, 2010

Another Layered Flower Card


Here is another card I made using a coloring book image found on the web. This one is a bit more subtle then the last one, because I used papers that were more similar in color. I used three different papers from two different digital paper kits that I got for free off the internet. I used the same paper for the flower petals as I did for the backround paper. I used a cream colored paper for the flower face and the pot. I then used a green paper for the stem and leaves. I used foam tape to attach my flower to the matting (made with a piece of black paper and a piece of white paper I put through my sizzix embossing machine with the mosaic cuttlebug folder). I stamped the sentiment with a $1 stamp I got from Joanne's using staz on ink.

I'm entering this card into the Moxie Fab World challenge and over on the Paper, Scissors and Superheroes blog.

Layered Flower Card


Here is a card I made using a free coloring book page I found while googling (sp?). I printed it out on four different papers from a free digital paper set I found on the internet called Tie-Dye Cherry Blossom. I made a gradient fill design in Adobe Photoshop Elements using the dropper tool and taking two samples of color. I used this for the backround paper, the top flower section and the part with the black border (was that as confusing as it sounded?). In case I didn't mention it...I hand cut all the layers (this is probably why my husband mentioned that it seemed to be taking a REALLY long time to cut that out!) then I used scotch foam tape to layer the different layers of the flower. I topped the flower off with a bit of bling using a heat fix gem. I then stamped the sentiment with staz on using a inkadinkadoo stamp. Hope you like it :)

I'm entering this into the Moxie Fab World challenge and the challenge on the 'Paper, Scissors and Superheroes' blog.

Saturday, March 20, 2010

Anniversary 'Card' for my parents


Here is a 'card' for my parent's anniversary. The reason I say 'card' is because it is more like a tag, just not in tag shape. I cut some cardstock down to the size I needed for my stamp. I then backed it with some recycled cardboard. I used the script stamp from the Tim Holtz 'Urban Grunge' set. I stamped in versamark and heat embossed with clear embossing powder. I then inked over that with broken china and peeled paint distress inks. I cut a '42' out with SCAL and embossed it with the mosaic cuttlebug folder (I think thats what it's called). I used a circle stamp from a $1 set of clear stamps from studio G found at Michael's. I stamped that out 6 times and stamped out H-A-P-P-Y using the Heidi Swapp alphabet stampset (with peeled paint distress ink), then in the 6th circle I stamped 'nd' with an alphabet set from inkadinkadoo (with broken china distress ink). I really like how it turned out (personally :) )

Valentine's Day Card


Here is the card I made for my daughter for Valentine's Day (I know I'm a bit behind). I used a free teddy bear svg from svgcuts.com (their free svg's at http://svgcuts.com/blog). I used an inkadinkadoo stamp for the lips :)

Sunday, February 28, 2010

Truck Birthday Card


Here is a card I made for my father-in-law's birthday. I used stamps from tim holtz's visual artistry clear stamps. The truck is from The Journey and the sprig is from the Flights of Fancy set. I printed off the 'Happy Birthday' from the computer and embossed it with the mosaic cuttlebug folder. I heat embossed the truck with blue embossing powder. I stamped the sprig with peeled paint distress ink.

Entry for the Hero Arts Blog 30grand


I'm putting this on my blog as well as the hero arts flickr group. Here is a card that I made using some butterfly stamps from hero arts. I stamped the butterflies onto some digital paper that I bought from 300dpi. It's the second Mariposa kit, I believe. I cut them out and layered them onto the card with foam tape. The flower border on the bottom of the card was made with a stampendous set called 'flower tops'. I stamped it with yellow colorbox chalk ink and then I cut it out and adhered to my card front. The blue paper on the card front is from The Garden Party Stack from DCWV.

Thursday, February 18, 2010

More string art on a card


Here is some more string art! :) I got a pattern from a library book (don't ask which one - I think I have checked out every different kind of card craft book that my library has!). I copied the pattern onto some tracing paper and then placed the tracing paper over my cardstock and pierced my holes. I then followed the instructions for stitching. I used two different colors of metallic thread. I cut around the design with some decorative edge scissors and attached to my cardbase. I am entering this into the Cuttlebug Challenge blog for Be Inspired #71. Hope you like it 8)

My Stitched Card


Here is my card for the Be Inspired #71 challenge on the cuttlebug challenge blog. I used a pretty shade of blue with my black. I cut kind of a top note shape using the accent essentials cartridge on my cricut. I cut multiple sizes of circles using the plantin schoolbook cartridge on my cricut. I textured the circles using my sizzix texture boutique with the sizzix flowers and the sizzix dots folders (not sure of the exact names of the folders). I adhered them to the top note shape and then cut off the excess. I pierced holes then hand stitched some sparkly embroidery floss on. I adhered the top note to the card with scotch foam tape. I textured the card front with the swirls cuttlebug folder. I cut the butterfly top and shadow and chipboard out using scal with my cricut. I put diamond stickles on the butterfly top. I then adhered the butterfly on with scotch foam tape. Hope you like it :)

Friday, January 29, 2010

Entry for Lucy's Cards: Challenge 4 - Glitter


Here's my entry for the challenge on Lucy's Cards http://hedgehogsandladybirds.blogspot.com. I used paper from a free collection that I downloaded from Two Peas in a Bucket. The striped paper is from the All u Need digital collection. The panda was cut using the Pagoda cartridge on my cricut. The digital paper used for the body of the panda I got for free off the internet. It's called FSS - TieDyeCherryBloss FULL Freebie. I covered it with diamond stickles. I stamped the angel wings with the regal flourish visual artistry stamps by Tim Holtz in Black Staz on and put Stampendous Stamp-n-stuff Embossing Powder in Star Dust Transparent on them. Sorry for so many pictures, I felt that in order to see the sparkle, I had to take shots from different angles :)

Tuesday, January 19, 2010

Faux layer card


Here is card I made using a technique that I saw on youtube. Splitcoaststampers demonstrated this technique. I used my hero arts antique writing stamp with tea dye distress ink and then inked over the area with some more of the same color using my foam blending tool. I stamped the sentiment with an inkadinkadoo stamp with black staz on and then embossed with some stampendous embossing powder with the glitter in it. The butterfly is also a inkadinkadoo stamp, stamped with black staz on.

Butterfly card


Here's a card I made using a cut file with my sure cuts a lot and my cricut. Boy, that was a mouthful! lol! Anyway, I stamped it with my hero arts antique writing stamp and embossed with clear embossing powder. I drew the antenna's on myself (as if you couldn't tell). Then I used some liquid pearls to put a line of dots down the center of the butterfly body. I used the small hearts that cut out of the butterfly along the bottom. I colored them with scattered straw distress ink and covered them with diamond stickles. I popped up the hearts with some scotch foam tape for dimension.

Cards made with the Pagoda cartridge


Here are some cards that I made using the pagoda cartridge. I made my own stencils using a piece of cardstock with some white shelfliner adhered to it. I stenciled (sp?) one koi with scattered straw and peeled paint distress inks; the other koi with worn lipstick and broken china distress inks; the flower with peeled paint, scattered straw and worn lipstick distress inks. Then after inking, I embossed the images with the stencils. For the green koi, I cut the layer using some photo paper. I then inked it with bottle and denim alcohol inks. I attached it with some scotch foam tape for some more dimension (I guess it's kind of hard to see the embossing on this one). The flowers on the side of the green koi and the blue/pink koi were made with a flower punch using floral chiyogami paper.

Wednesday, January 13, 2010

Have a Great Day Kitty Card


Here is a card I made for my daughter. I actually bought this stamp set for my daughter for Christmas. She said I could borrow it :D. The stampset is by recollections and is called "Meow Meow". I stuck this card into my daughters lunch bag so she could find it at school during lunch. I used the same technique that I used on the butterfly card. I stamped the cat. Then I used a circle template to draw a circle around a portion of the cat. I cut around the circle, and then around the cat. I adhered the cat stamp onto another, slightly bigger circle that I cut out and then inked with my ink blending foam tool. I colored in the cat with my new ranger distress inks, using my ink blending pen.

Thinking of You Butterfly Card


Here is a card I made. I used the negative from a cut out that I made with my cricut. It's kind of like a top note shape. It was on my accent essentials cartridge. Anyway...what I did is embossed the image on the front of my card. Now I know to save the negative image of my cut outs. They make great embossing templates. I don't have a light box, so I used my window. You put the negative behind the card and use your embossing tool to press around the outline. Then, viola! You have a cool embossed image! I just got some ranger distress inks and was having fun playing around with them. I have a blending pen, and used this to color in my stamped butterfly image. I then cut a circle and I used my foam blending tool to color the edges with the scattered straw color. I put the butterfly image on top of this. I also inked all the edges of the card.

Saturday, January 9, 2010

Thank You Card


Here is a card I made today for my Grandpa. I was struggling with how to make this card because I'm sending it to a guy and I thought it had to look manly. But, then I realized that it's a thank you card and it doesn't matter what it looks like or what sex it's aimed for. I used the pocket full of posies matstack by dcwv. I used a stamp that I got from the dollar stamps at Michael's. I used a sizzix embossing folder from the dots and flowers set in my new sizzix embossing boutique. I love the embossing boutique! It's nice to get a machine that only does what you need it for. I was struggling with whether or not to purchase a sizzix big shot or a cuttlebug because I didn't need a die cutting machine, only an embossing machine. Up till this point I've been getting by with using my pasta machine to emboss with the cuttlebug folders. Let me tell you, the embossing with the embossing boutique is a major improvement!